How to make labels in Word
This guide will show you how to create and print labels using Microsoft Word. Printing labels is handy on many occasions: for sending a letter in bulk, to personalize some jars, to label wedding invitations or Christmas gifts... After learning how to mail merge labels in Word, we'll see how you can make this task even simpler by creating labels in Google Docs instead of Word.
Here is a summary of this step-by-step guide:
- Open Microsoft Word
- Click on "Labels"
- Select a vendor
- Select a template
- Add your text
- View your labels
- Preview before printing
- Print labels
1. Open Microsoft Word
Go to "Mailings" section in the menu at the top of your Word window.
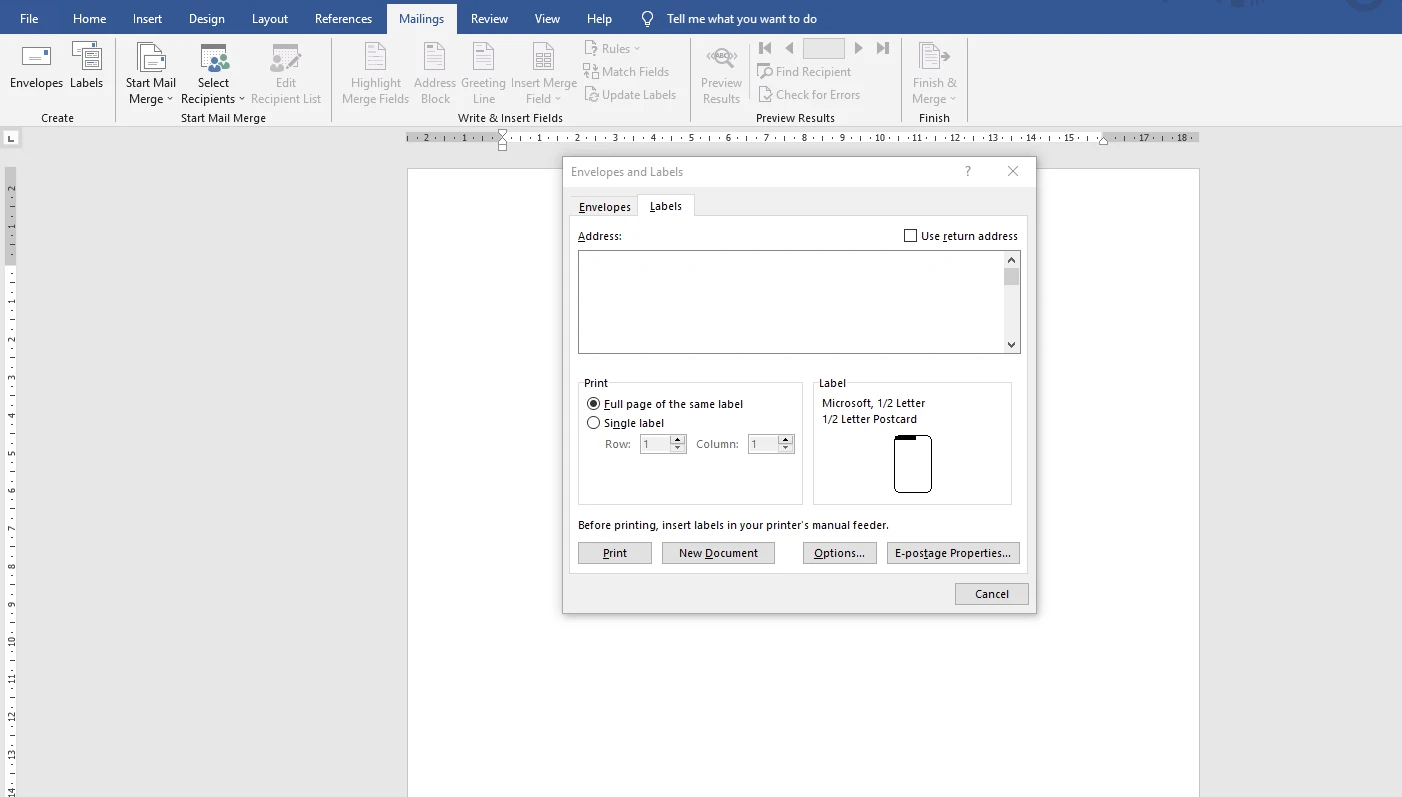
2. Click on "Labels"
In the Mailings section, click on "Labels". A window will open allowing you to define your labels preferences.
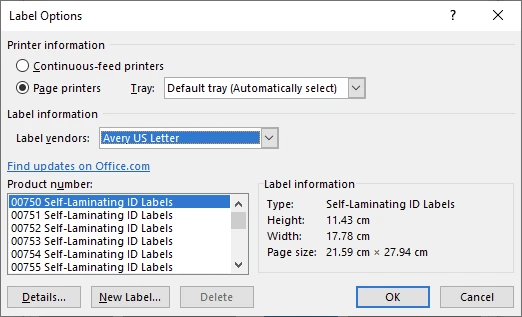
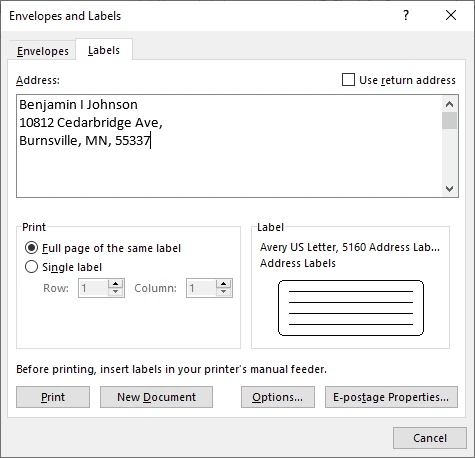
3. Select a vendor
Click on "Options", then under "Label Vendors", pick a category. Here we will be using Avery US Letter as it is a commonly used label format.
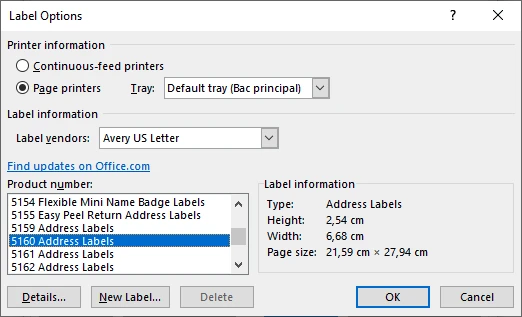
4. Select a template
Select a template, also known as "Product Number". In this example, let’s use "5160 Address Labels", which is the most commonly used template. Click "OK".
If you can’t find the layout you need, you can select "New Label" and set up a custom tag format. Once done, click "OK".

5. Add your text
In the blank space at the top, type in your text. In this example, it will be an address but depending on the template you have chosen or the creation purpose, it can be anything. It can be names, QR codes, the name of your company.
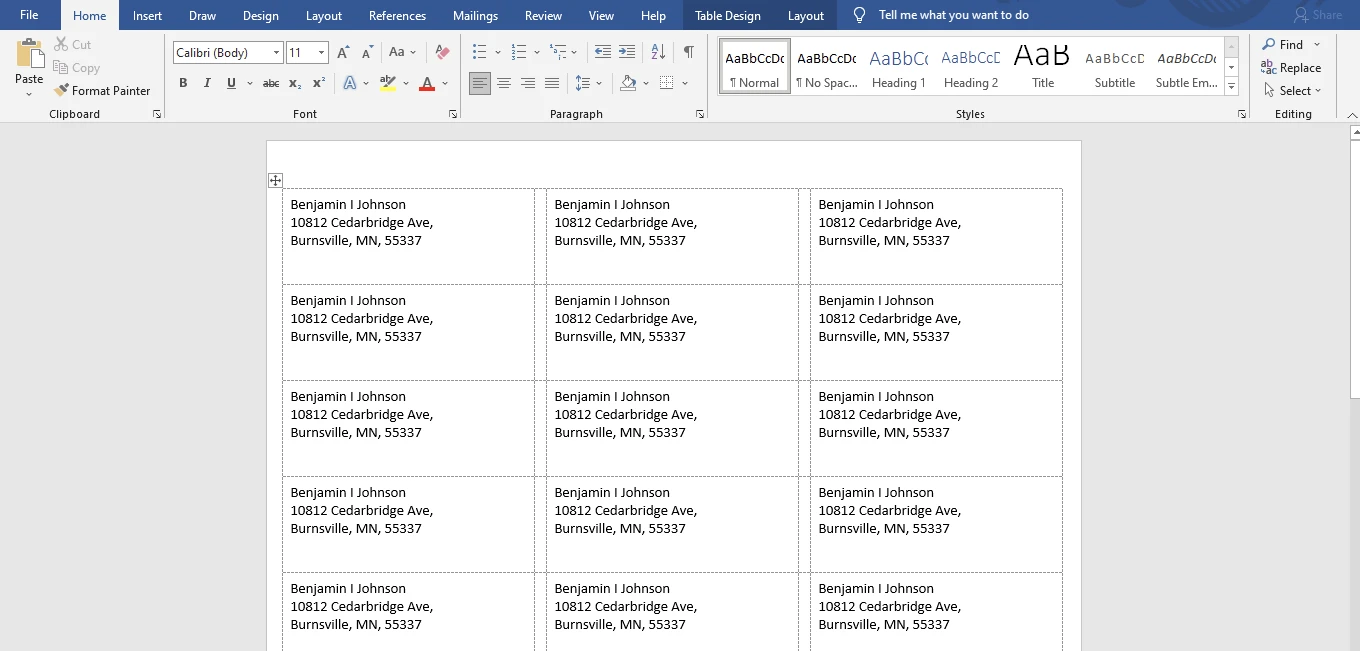
6. View labels
To see your labels before printing, click on "New Document" at the bottom of the window. A new Word sheet showing your tags will be created.
7. Edit your text
To edit the font or color of your text, select the whole page or some parts then make the changes the usual way.
8. Print labels
You can now print your labels. Just go to File > Print. Before hitting "Print", check that they look as expected. For better results, set the margins to "none" or "narrow" and the paper size to "US letter". If you don’t want to print them straight away, just save the document for later.
Going further: a simpler way to print labels without Word
What if we told you there's an easier way to create labels without Word?
Labelmaker lets you create labels with Google Docs and Google Sheets. Labelmaker is super easy to use, even if you're not tech-savvy. It has all the functionalities offered in Word, except that it's much simpler to use! You just need to install Labelmaker from the Google Workspace Marketplace and to follow our easy step-by-step guide to make labels.