How to make Holiday labels in Google Docs
You can never start Holiday preparation too early! In this guide, we're teaching you how to make Holiday labels in Google Docs. This guide teaches you how to print your own Holiday labels at home:
🎉 How to print Holiday labels in 10 steps:
- Open a document in Google Docs
- Open Labelmaker
- Select a template
- Insert a table
- Add an image and text
- Remove table borders
- Personalize your labels
- Create the labels
- Preview before printing
- Print your Holiday labels
1. Open a document in Google Docs
First, open a new document in Google Docs and leave it blank. That document will be used to create and print the Holiday labels.
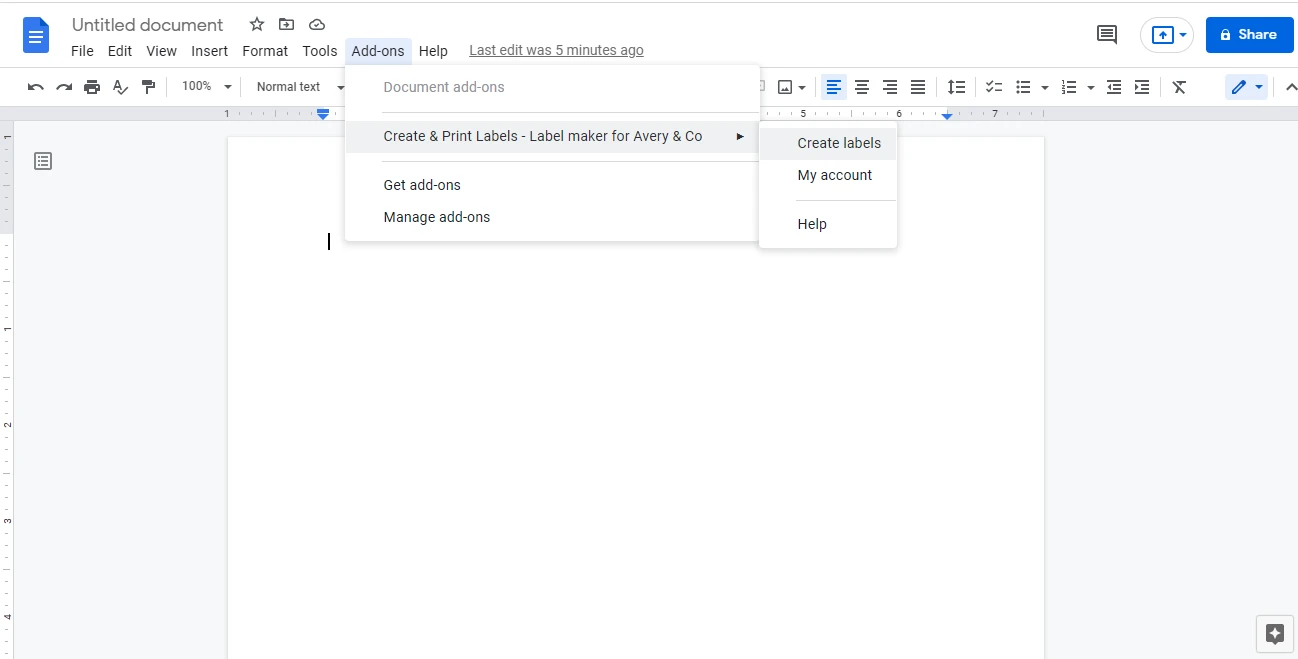
2. Launch Labelmaker
Then, go to the "Extensions" menu (previously named "Add-ons") and select "Create & Print Labels". If you haven’t installed the add-on yet, you can install Labelmaker from the Google Workspace Marketplace. When the installation is finished, you might need to reload your document by closing it and reopening it and the add-on will appear.
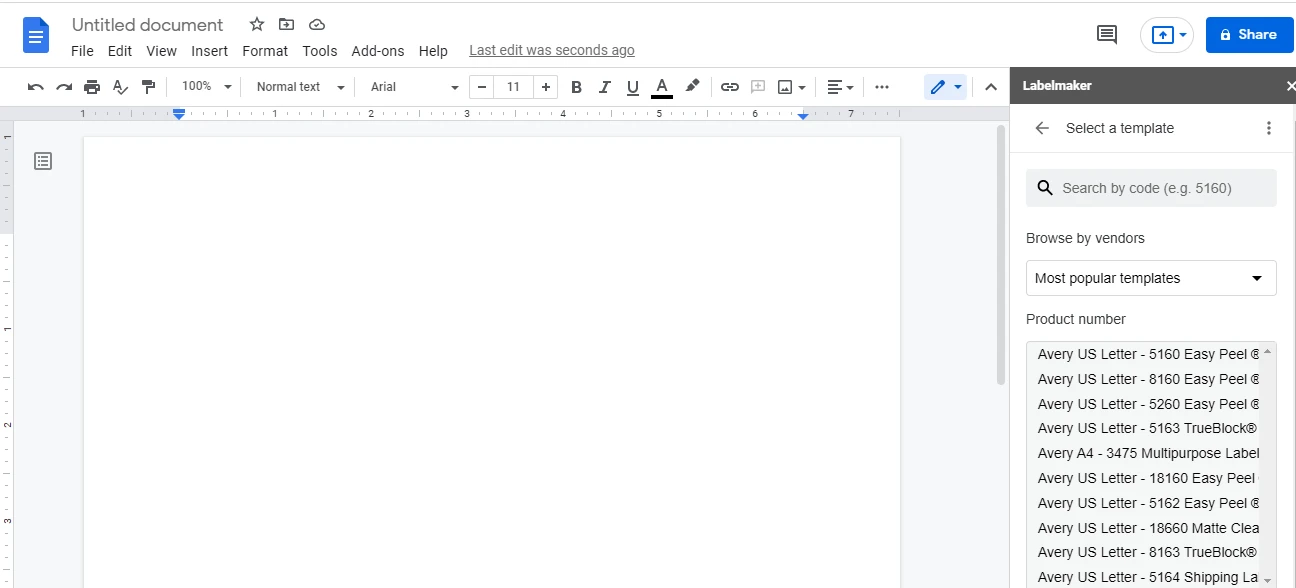
3. Select a template
In the Labelmaker sidebar, click on "Select a template". You will be given several template options. As of writing, you can choose from over 5000+ labels.
There are several vendors we're compatible with to print Holiday labels. In this label guide, we will be using the "Avery 5160" template, which is a commonly used label format.
4. Insert a table
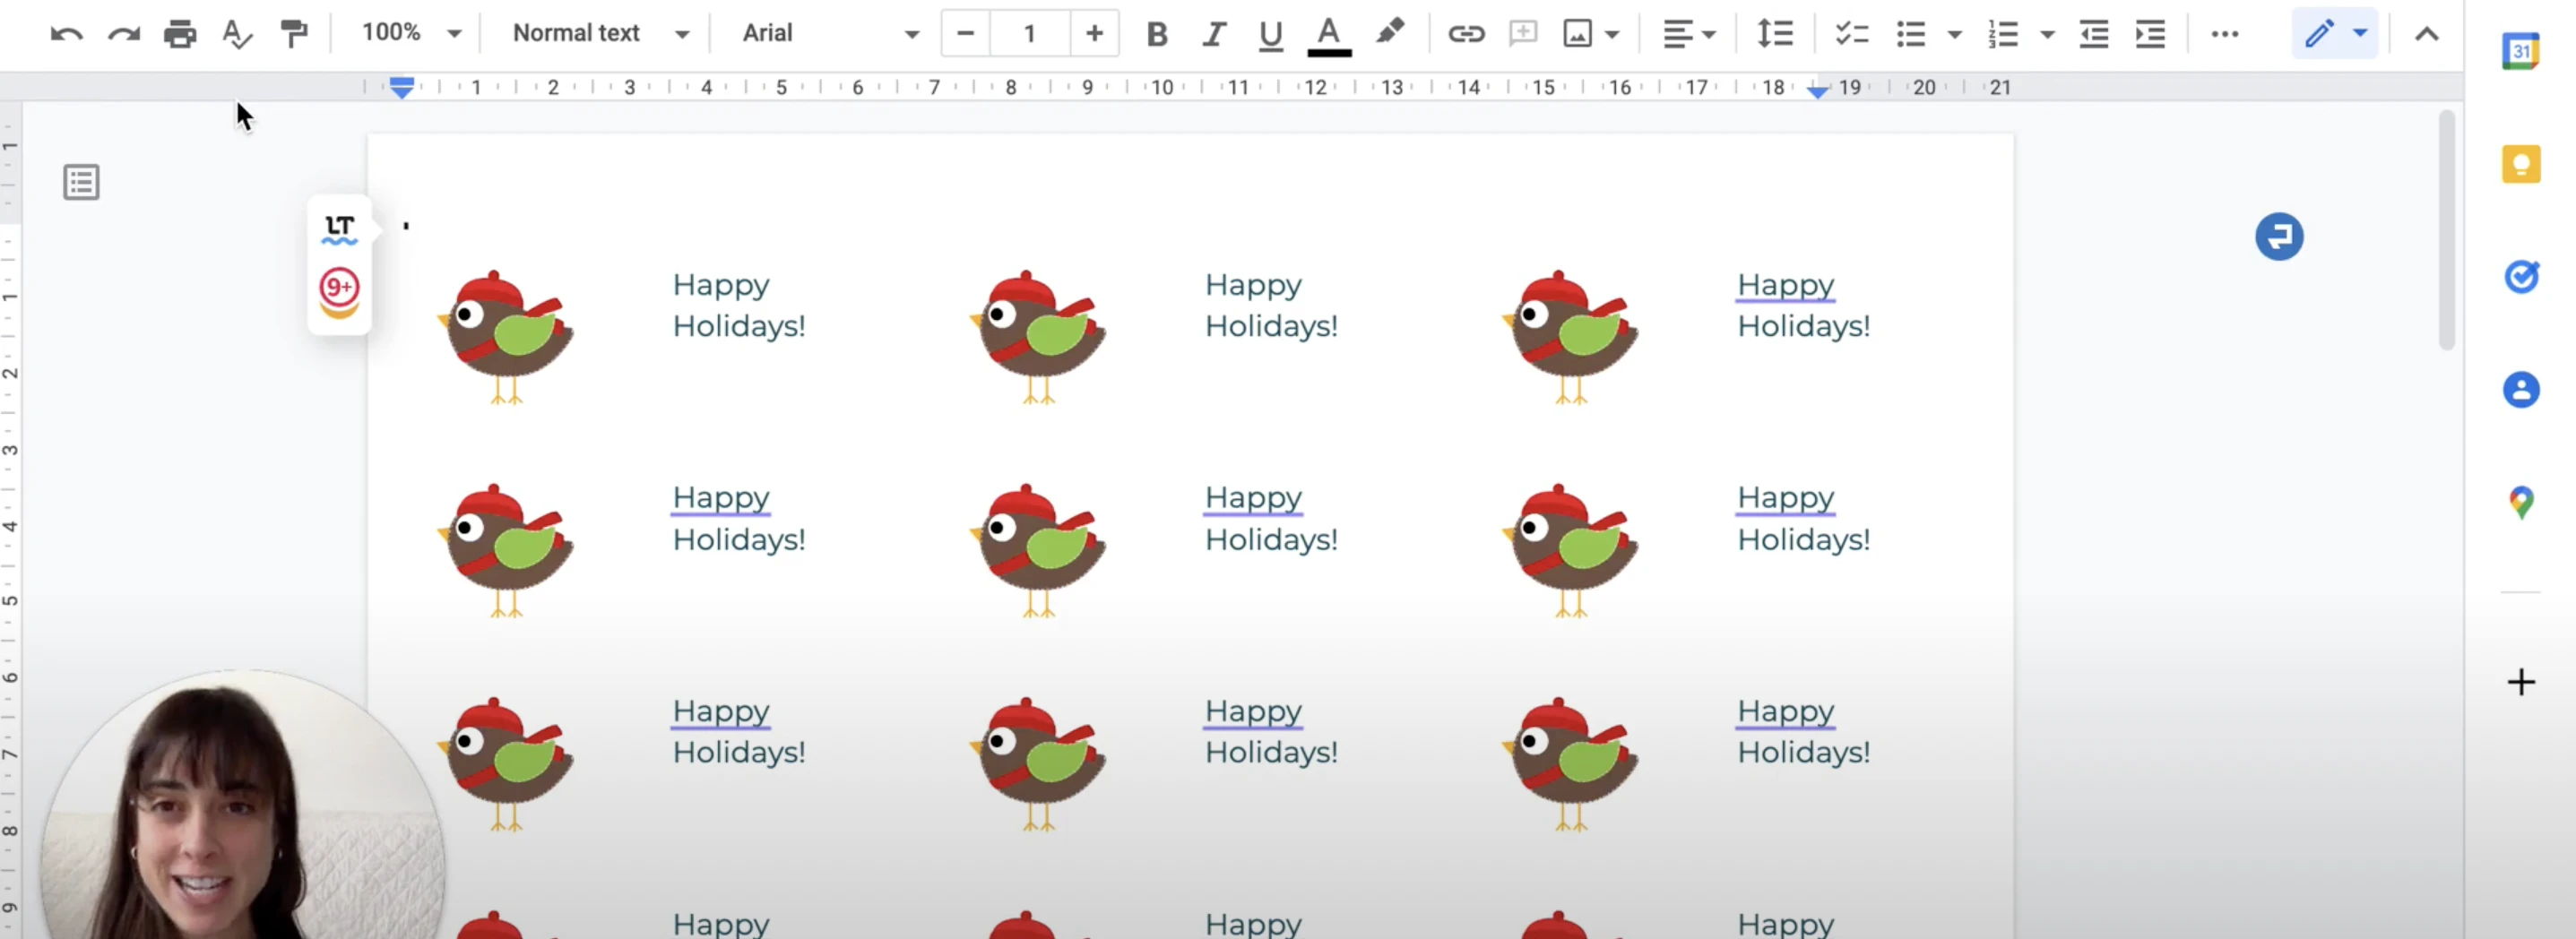
Now is the time to start designing your very own labels for a special Holiday. We are going to insert an image in the labels to decorate them.
To add an image in your Holiday labels, you need to insert a table in the first cell (the box with black borders). Inserting a table will allow you to have an image as well as some text on your label displayed next to it.
The example below shows you the result after inserting an image in your Holiday labels. Let's do it together step-by-step:
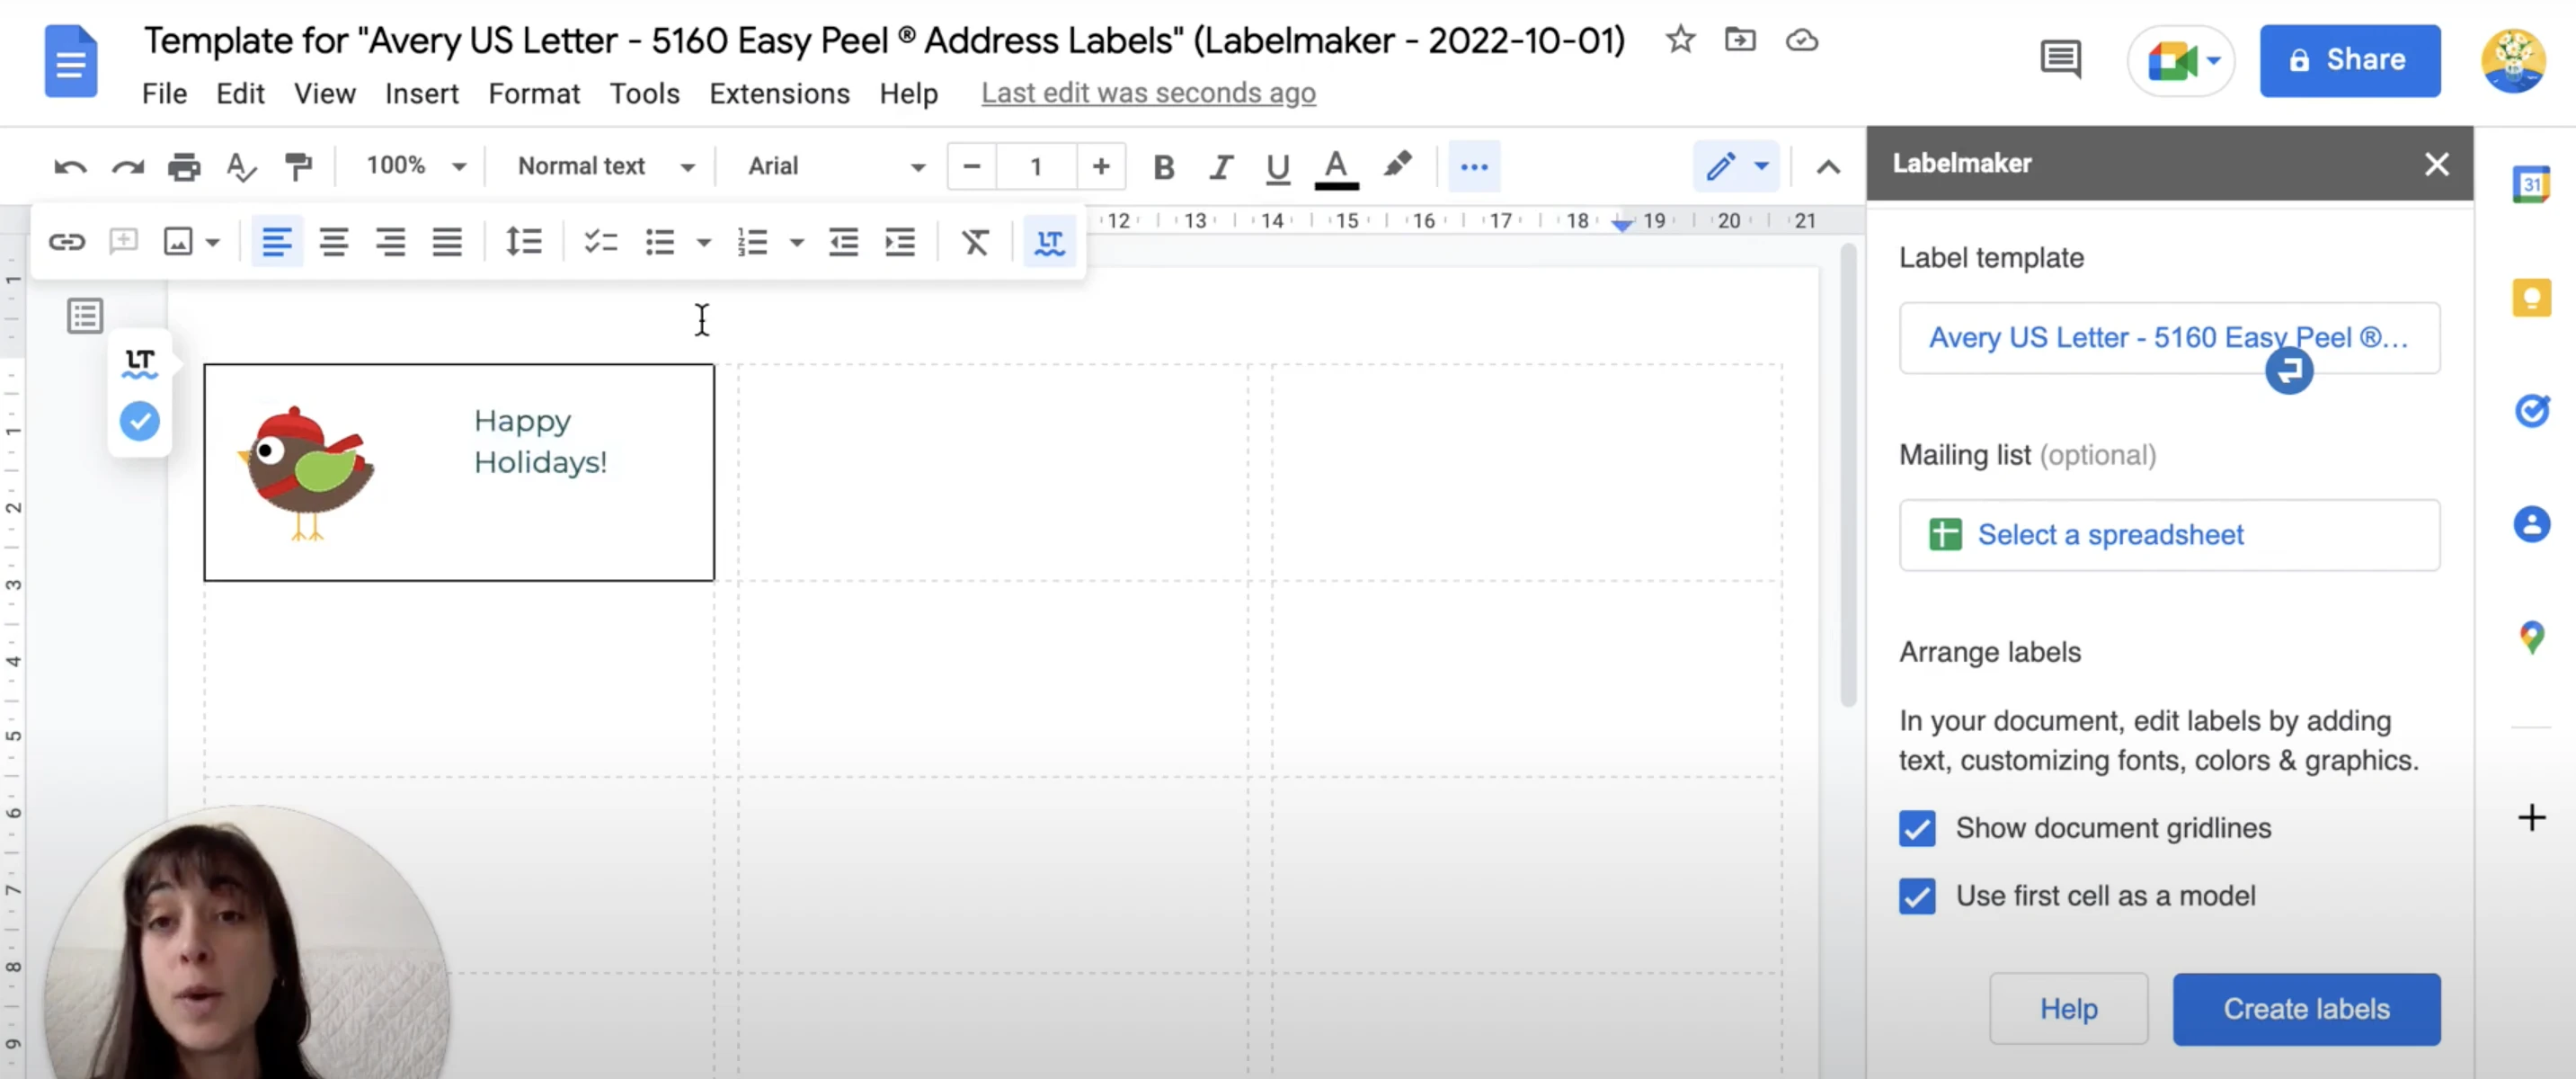
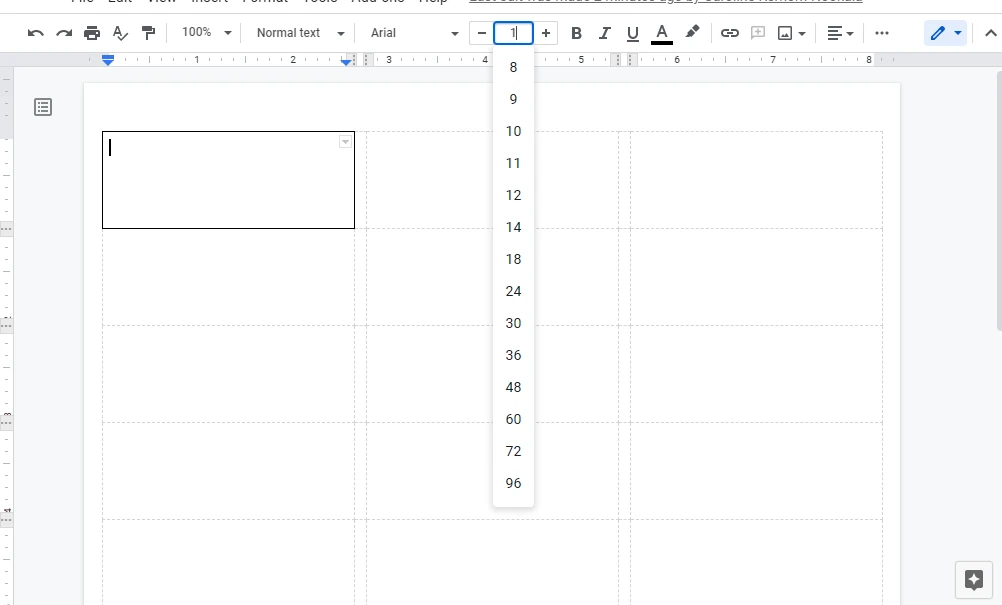
First, place your mouse inside the first cell, the one with black borders, and reduce the font size to 1. This will make some space for the table we're going to insert. It’s not compulsory but we advise you to do it so the table fits properly into the cell.
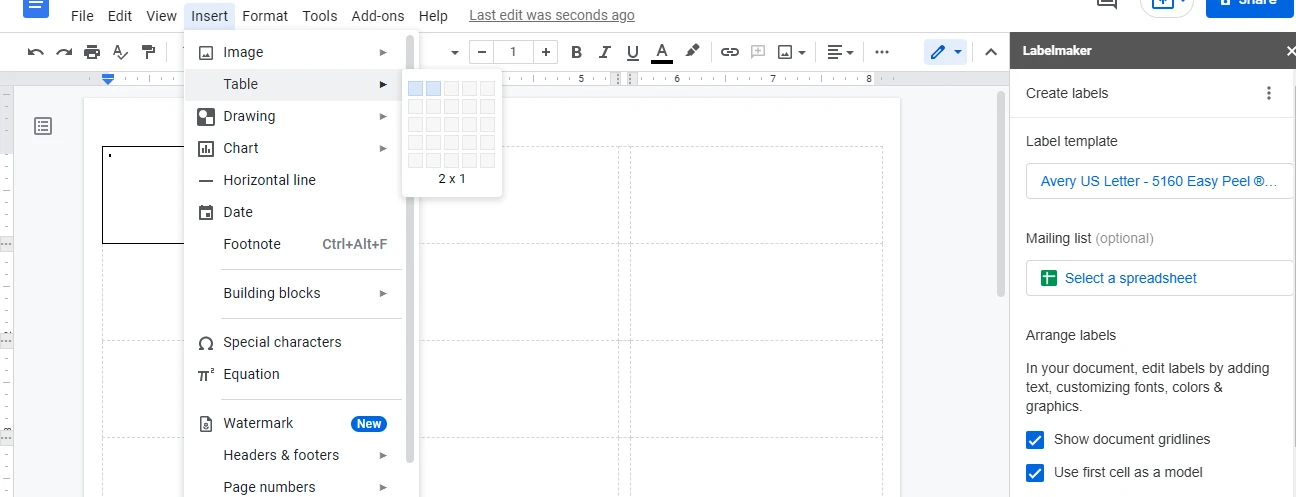
Then, go to the "Insert" menu at the top, click "Table" and select 2 squares (2X1) as shown here.
5. Add an image and text
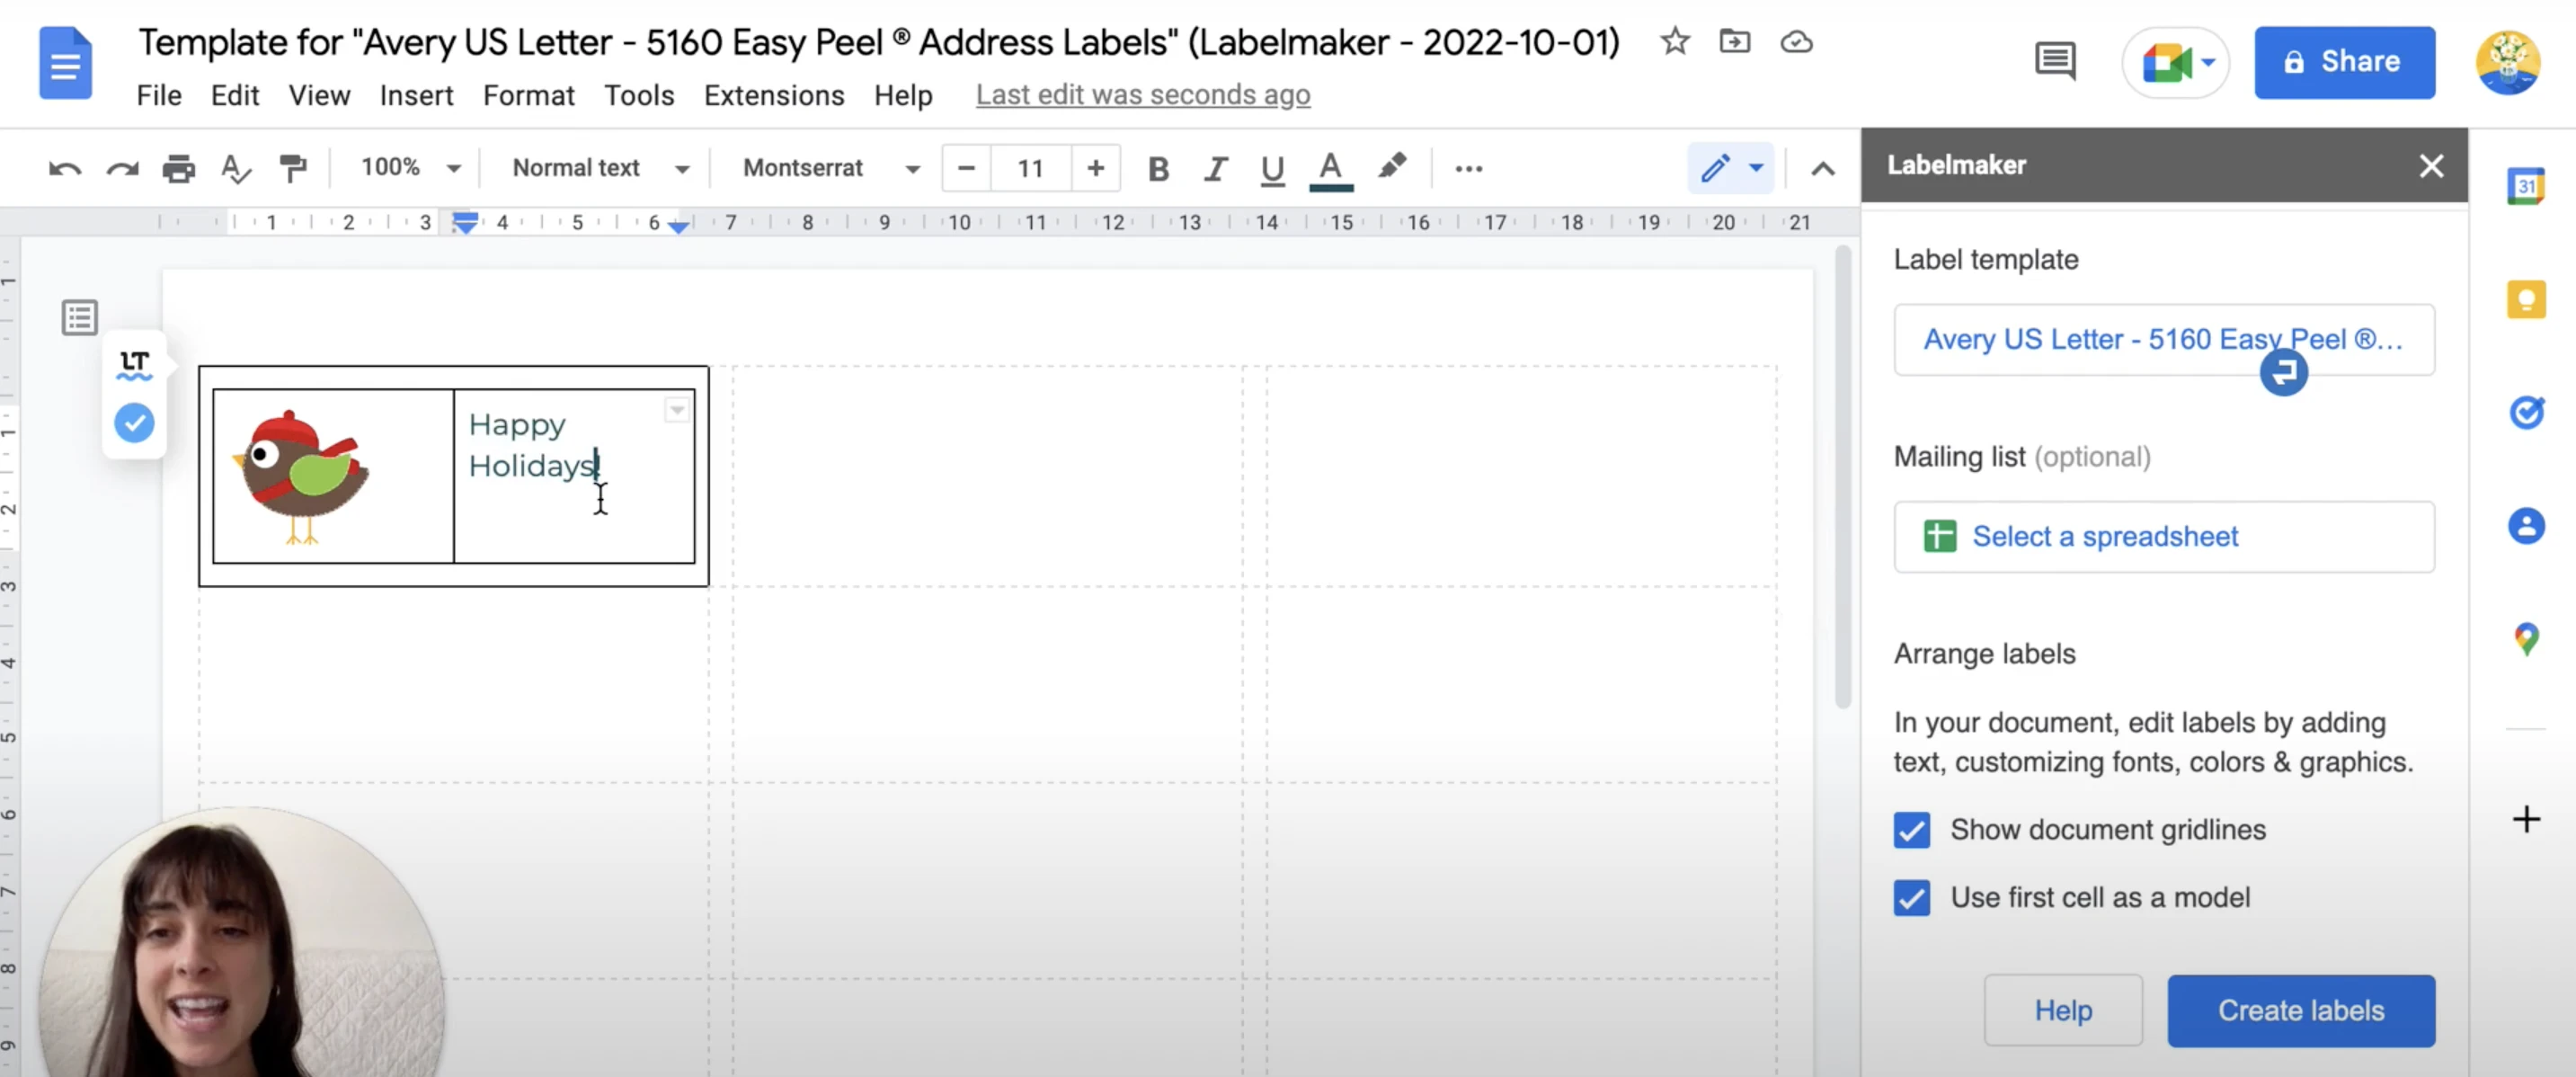
Select the image you want to appear on your labels and save it somewhere in your computer. Then in Google Docs, follow the steps:
- Go to the "Insert" menu at the top
- Select "Image" then "Upload from computer". You can also drag and drop your image directly from your computer into the first cell. When inserting your image, make sure it doesn't modify the first cell's height. If your image is too large, try to reduce its size to make it fit. Otherwise your labels will not align properly when printed.
- Once the image is in the cell, add your text in the other part of the table.
Tip: to enlarge your text, highlight it and click on “Normal text” then choose the font and size you like.
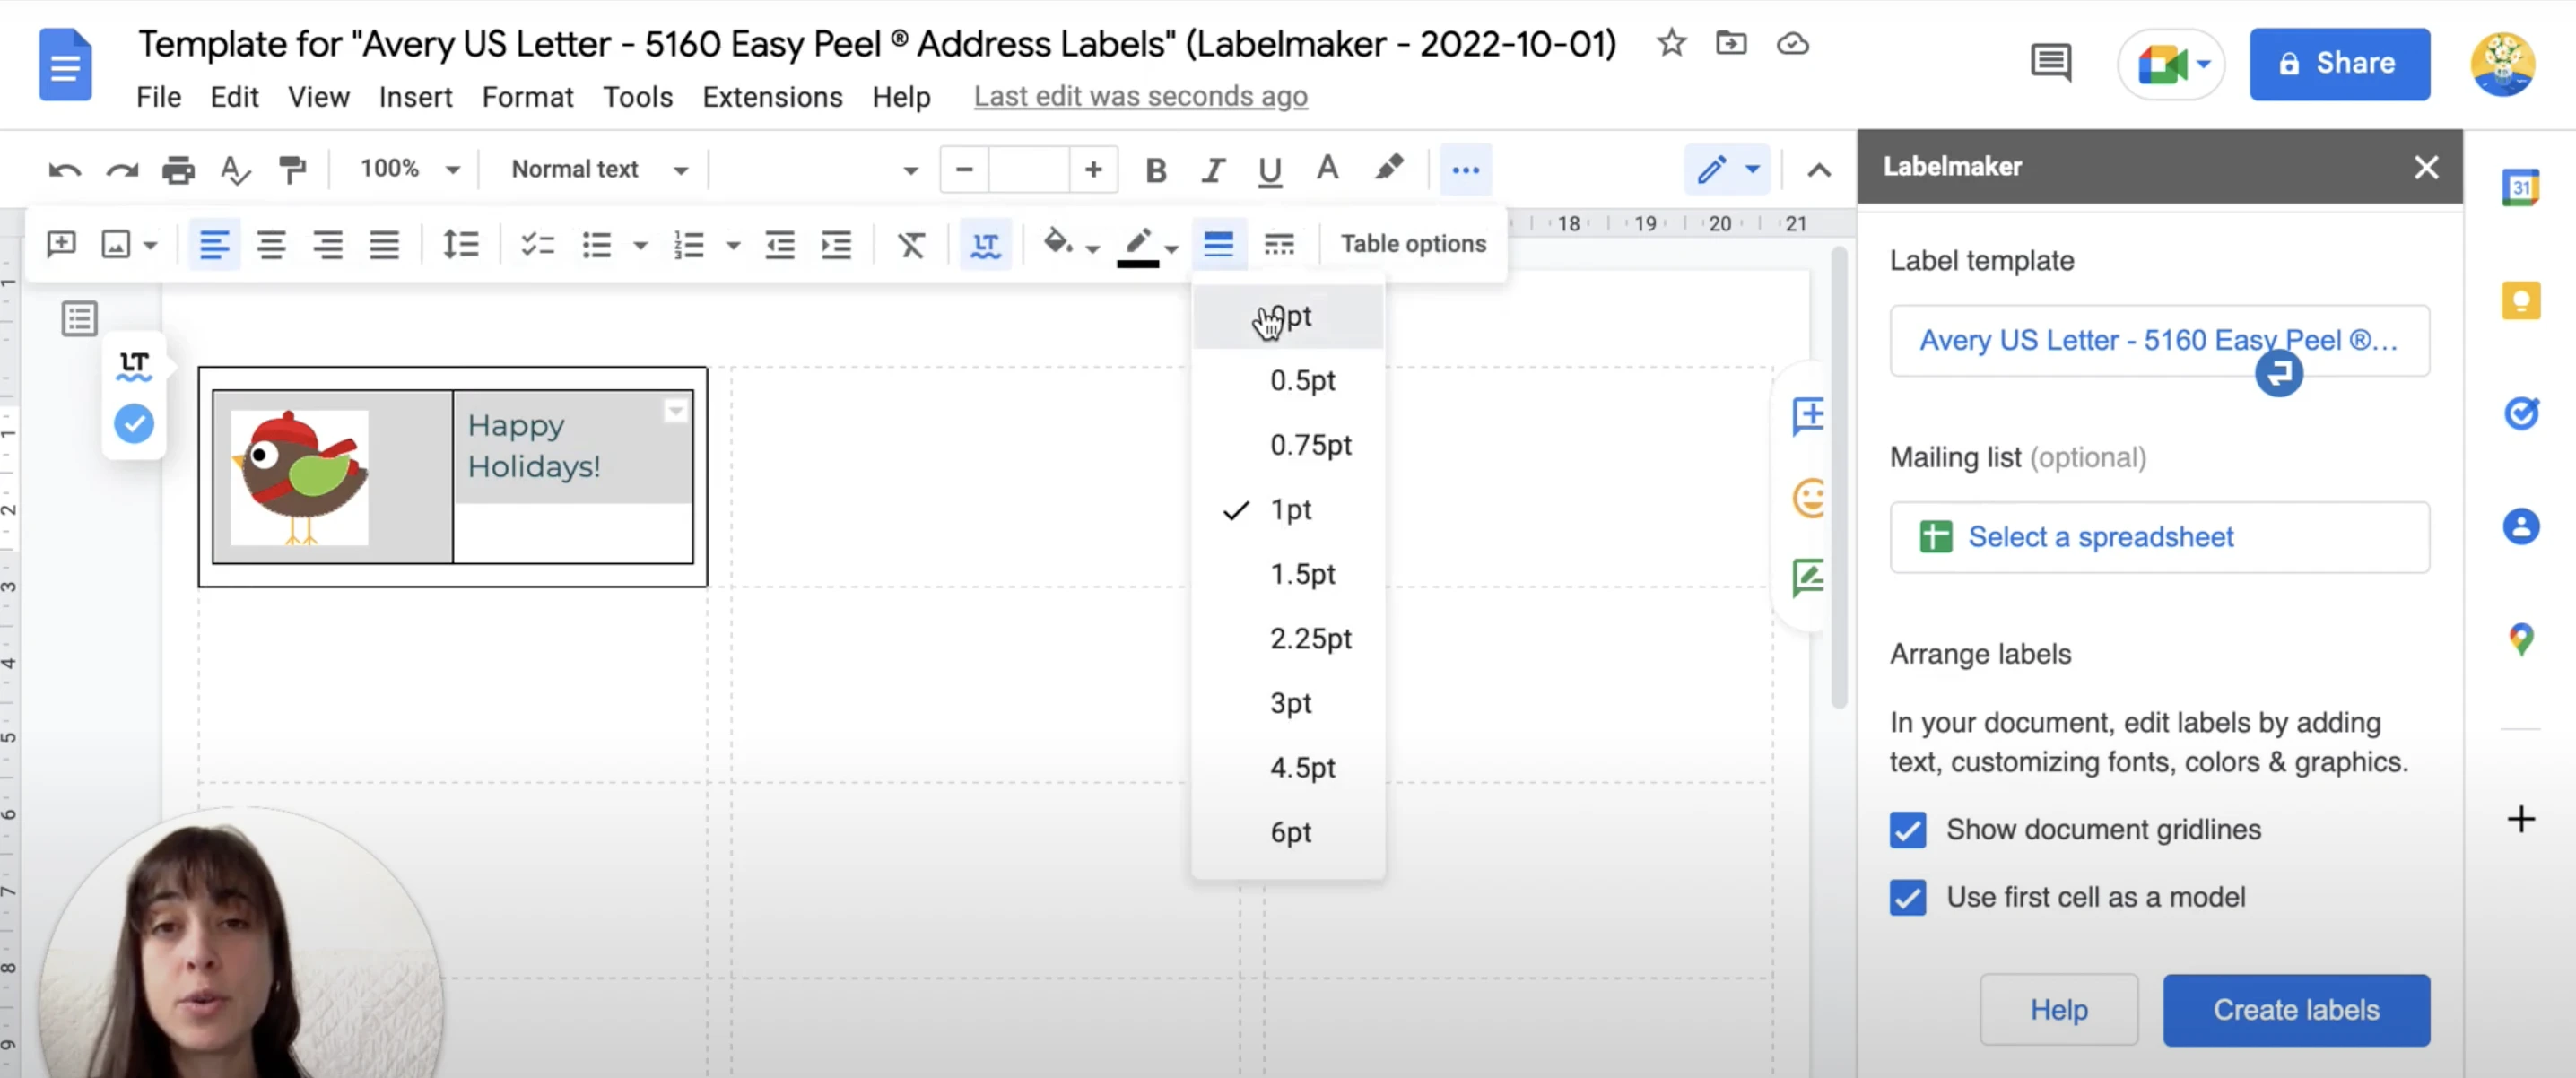
6. Remove table borders
Next step, we need to remove the black borders on the outside of the table because we don't want them to appear on our Holiday labels. To do so, select your table (drag your mouse from the bottom right corner to the top left corner), then from the menu in the top right corner, turn the border width to 0pt.
7. Personalize your labels
You’ve done it! You can now follow the same steps for the other cells and create gift tags for everyone. Simply copy paste the content of the first cells to other cells and add a personal touch to your gift tags. You could create one for each of your family members or relatives.
To create a variety of labels, you can also use a mailing list. That way you could print Holiday labels and use personalized information from your mailing list such as a Name, Address, City State, Zip Code...
8. Create the labels
Once you are done creating your Holiday labels, click on "Create labels" at the bottom of the sidebar, on the right. Don’t forget to untick “Use first cell as model” (unless you want to print a full page of the same labels). Wait for the labels to be ready and click on "Open document".
9. Preview before printing
Before printing your work, check that everything is in order, that there are no misalignment issues. Should you need to make some changes, just go back to the original document. Once the modifications are made, simply click on "Create labels'' again. This will create another page of labels.
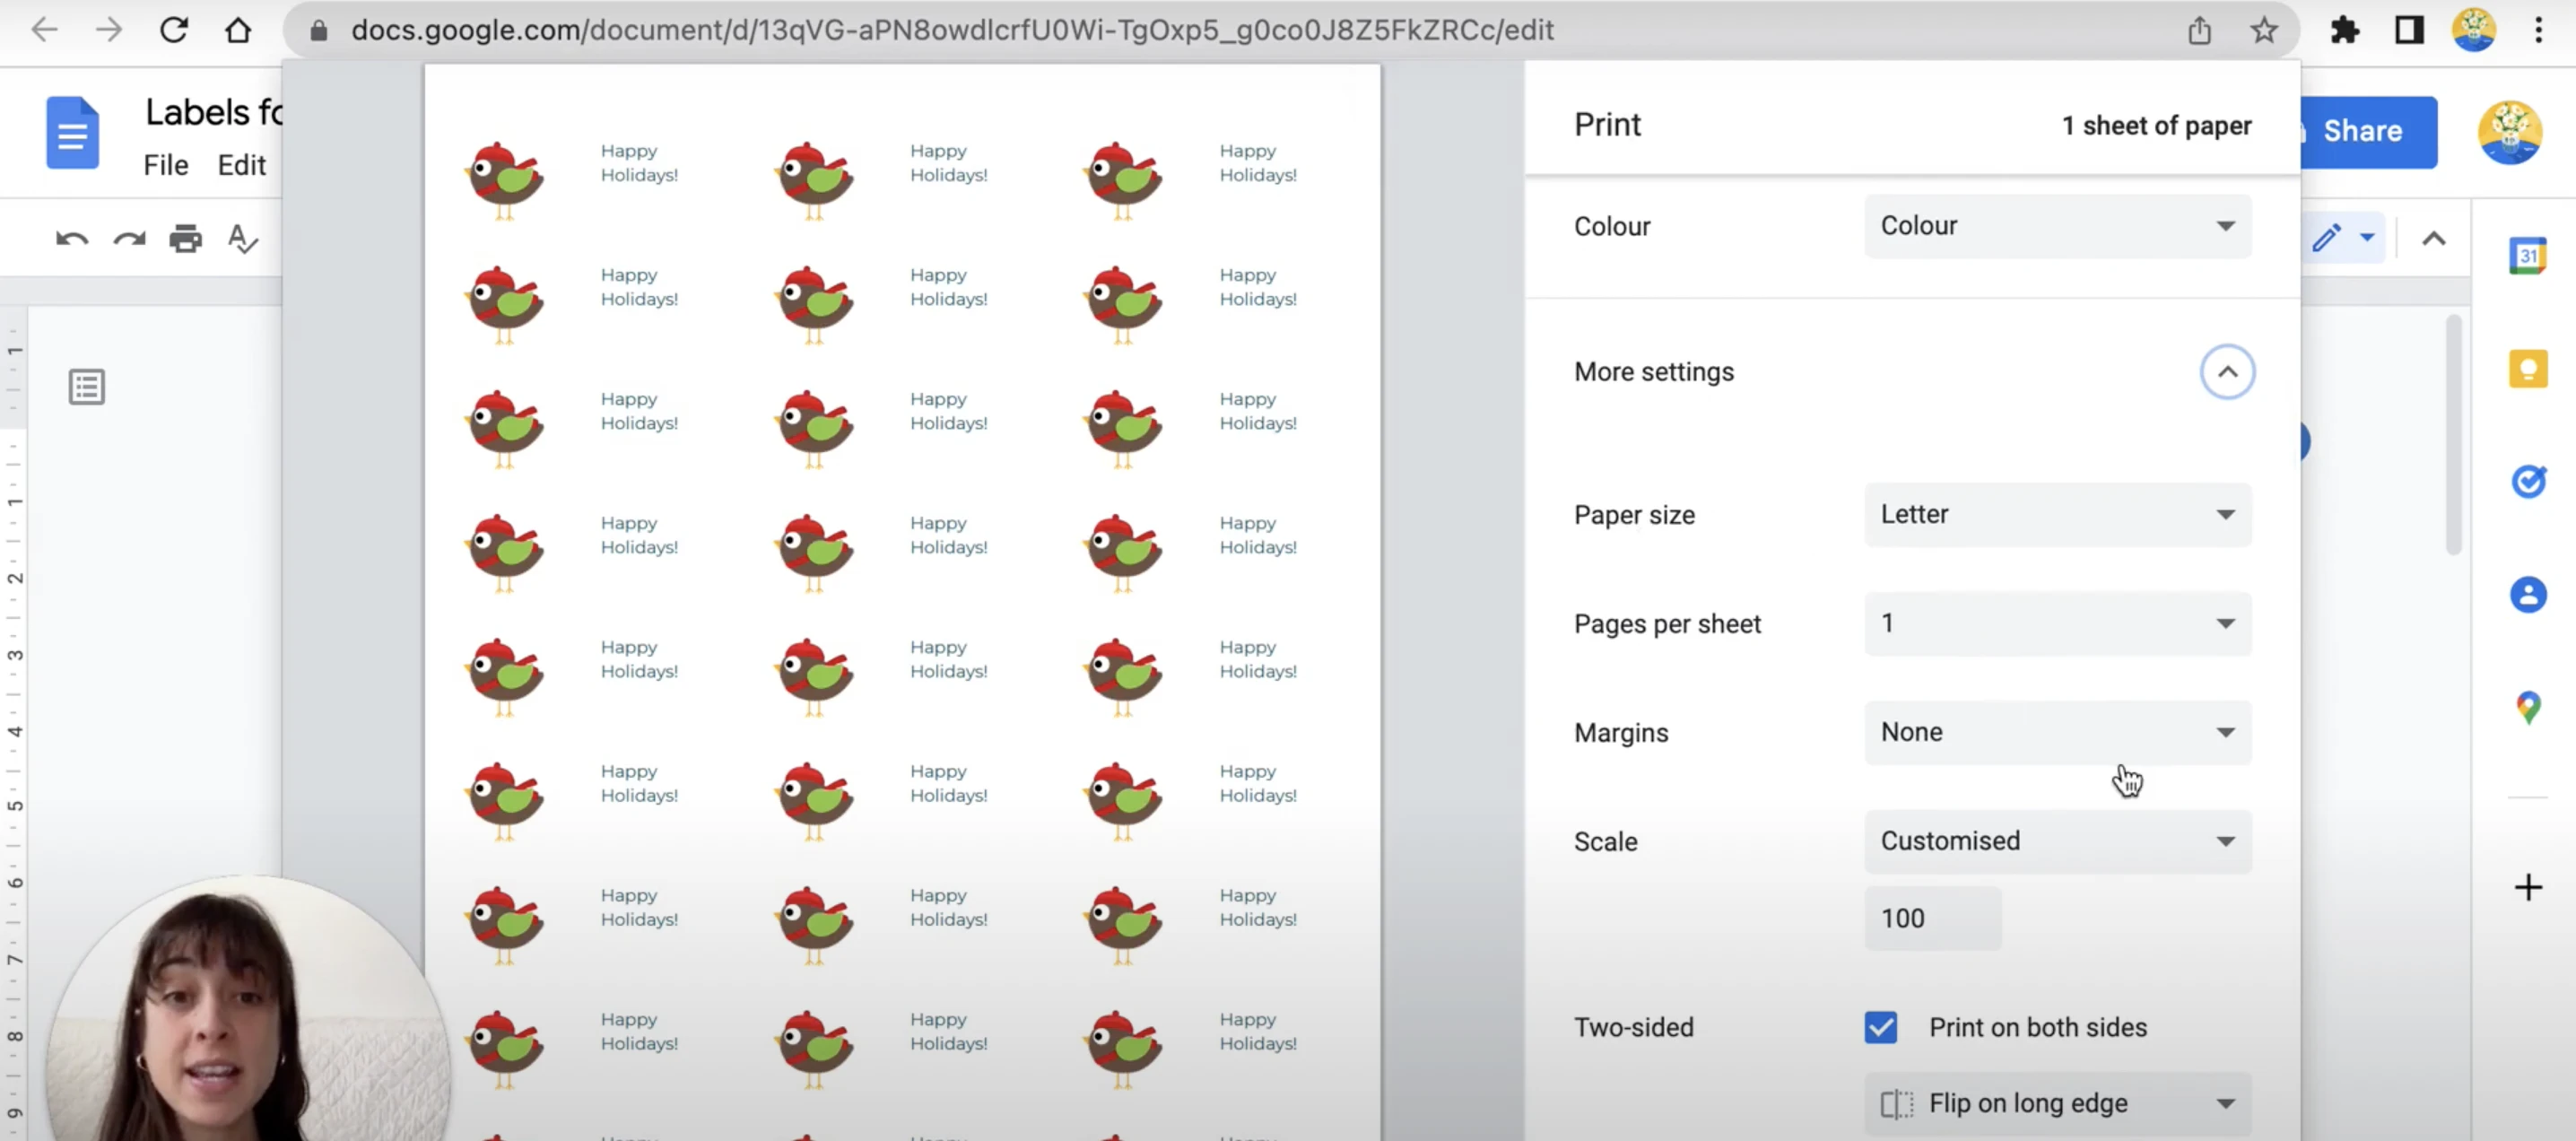
10. Print your Holiday labels
To print your Holiday tags, click on "File" > "Print". In the print dialog, check that the margin is set to none and the scale to 100%. Depending on the label format you chose, you might need to adapt the size of the page.
It's your turn to create Holiday labels!
Now you know how to make your own Holiday labels using the Google suite. A personal touch to your gift wrapping will wow your family and friends!
Using this guide, you’ll be able to print labels for Holiday with Google Docs as well as other kinds of labels and gift tags. You can use Labelmaker on other occasions such as the arrival of a new baby, a wedding or a work event. You can even create QR codes and more.
Install Labelmaker to create Holiday labels from Google Docs now! To learn more, check out our other tutorials. We also have a guide in case you’d like to print labels from Google Sheets rather than Google Docs.